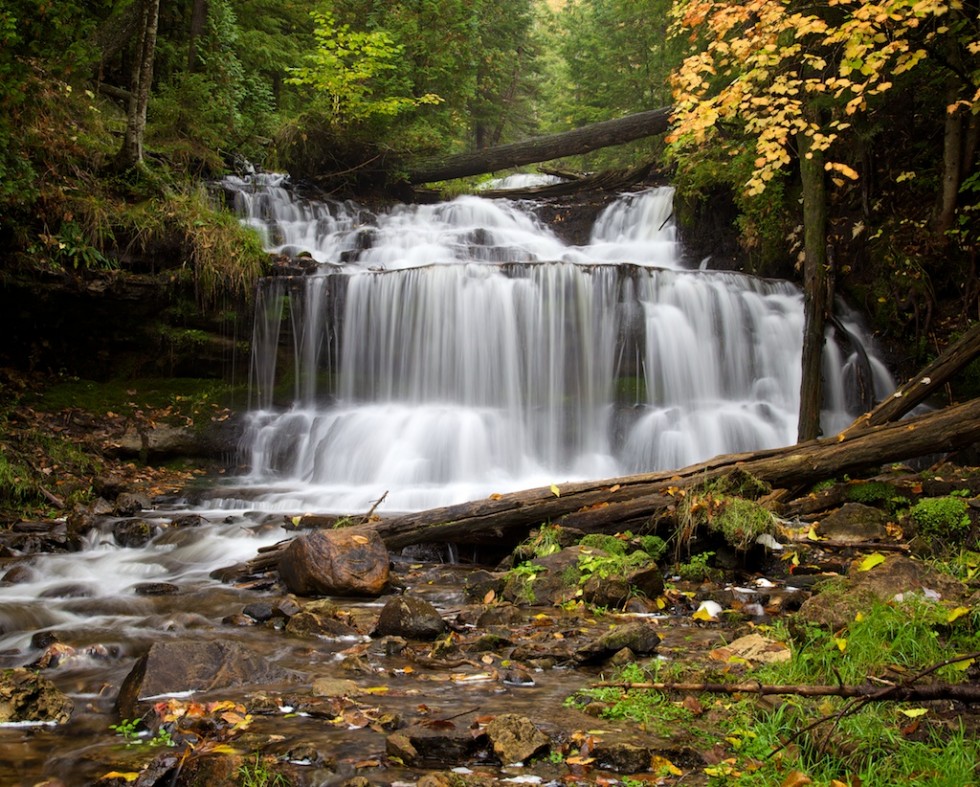
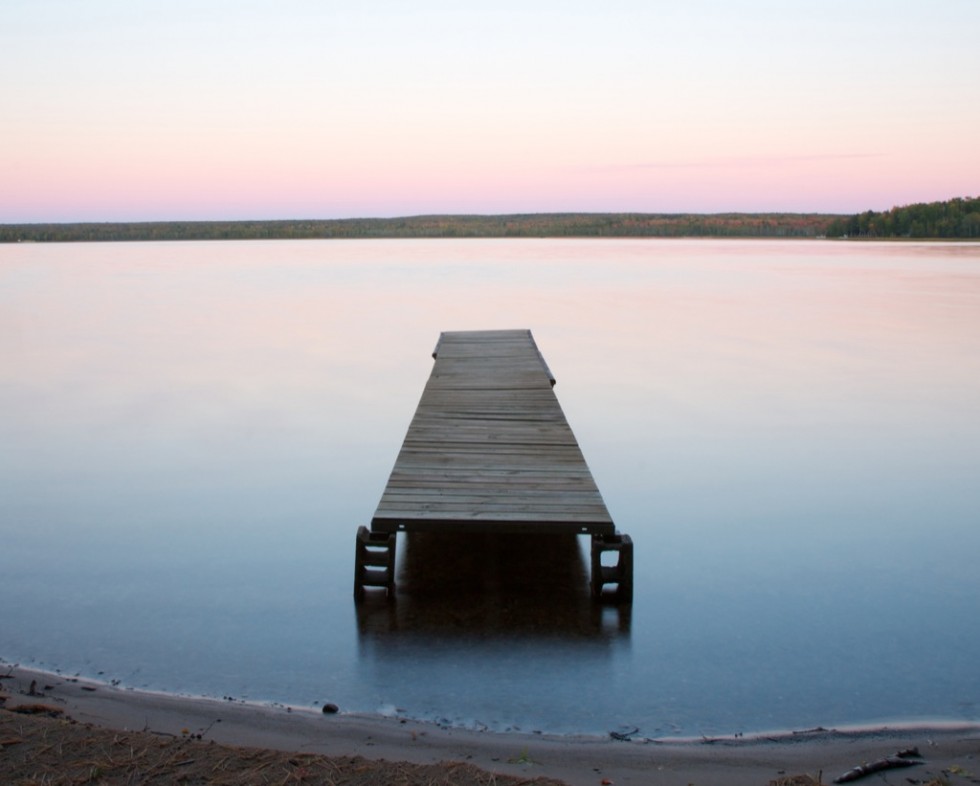
Today I’m going to give you the “photo recipe” to take a shot like my Lake of Glass.

Obviously you have to start with a strong composition to begin with. Here, it was dusk on Au Train Lake, just long enough after sunset that the sky still had some color, but not long enough that it was too dark. Most people will take photos until the sun sets and then take off. It’s a shame, because as long as you have a tripod, there is still a lot of color in the sky for about 20-30 minutes after the sun sets. I was facing East when taking this photo, so the sun was setting behind me.
The hazy water effect can definitely add a certain feel to a photograph. Here, the lake I was photographing was already pretty calm. It was the end of the day and the wind had died down long ago. But it wasn’t as smooth as the water shown in the photo. How’d I get it to look that smooth?
The answer is in the shutter speed. I used a longer exposure time, so the camera would average the scene over the entire amount of time the shutter was open. In this case, I kept the shutter open for 5 seconds. This is enough time for the water to move around a bit, giving that hazy feel. For this to work, you absolutely must have your camera on a tripod, otherwise the things you want to have in focus (the dock and the tree line across the lake) will be incredibly blurred from your moving the camera during those 5 seconds.
There are several ways to keep the shutter open longer on your camera. If you have a camera with manual controls, you want to set it to shutter priority mode, (Tv on Canon, S on Nikon). This mode will let you set the amount of time the shutter is open. You’ll want to use a time that is at least 2-3 seconds long, and preferably 10+ seconds.
In order to take that long of an exposure though, you have to keep the amount of light reaching the camera sensor to a minimum. There are two settings the camera will probably change to make this possible (the camera will make these changes automatically in Tv/S mode). One is the ISO setting. A lower ISO setting will make the camera sensor less sensitive. Use as low of an ISO as possible, so ISO 100 or ISO 50 if your camera allows it.
The second camera setting to watch is the lens aperture. Every lens has aperture blades that close to a certain diameter hole when you take a picture. If the blades close to a smaller hole, less light will get to your sensor and you can take a longer exposure. In the photo above, I used f/22, which was the minimum for my lens. One thing to keep in mind here is that higher f numbers correspond to smaller aperture openings, so keep your f numbers high.
You can also reduce the amount of light reaching your camera sensor by attaching a filter in front of your lens. In the case above, I had a polarizer on the lens, which cuts the amount of light about in half. This let’s me use a 5 second exposure instead of a 2.5 second exposure. The ideal filter to use in a situation like this is an neutral density (ND) filter. An ND filter is just like putting a pair of sunglasses on your lens. It dims the amount of light reaching your camera sensor by several orders of magnitude, depending on the filter. With a strong ND filter, you can take a several second exposure even in broad daylight, without resulting in an over-exposed image.
So that’s it, the recipe for Lake of Glass. Thanks for reading!